Custom plush toys are more than cuddly companions—they’re powerful tools in child development. From stuffed animals...
DIY Spider-Man Plush Toy Unleash Your Creativity with a Step-by-Step Guide
Introduction
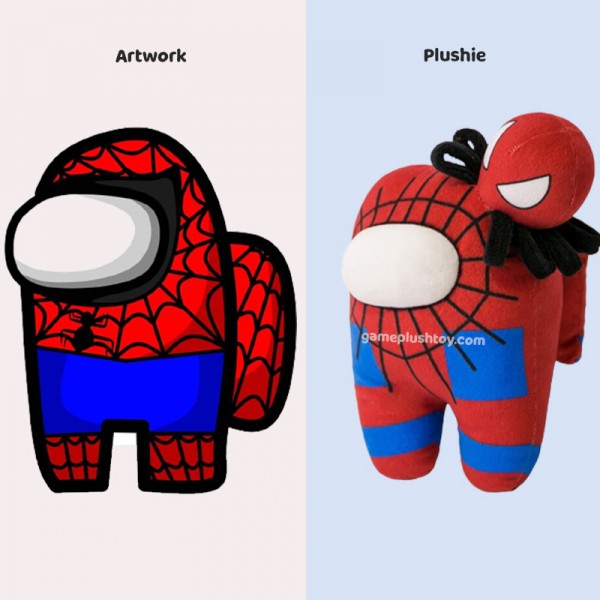
For crafty and creative individuals, making your own Spider-Man plush toy can be a rewarding and fun project. In this article, we provide a detailed step-by-step guide on how to create a Spider-Man plush toy from scratch. Whether you're a Spider-Man fan, a sewing enthusiast, or simply looking for a unique handmade gift, this DIY project will allow you to unleash your creativity and bring your favorite superhero to life. Get ready to dive into the world of crafting as we walk you through the process of making a Spider-Man plush toy that looks as realistic as possible.
Materials Needed:
To embark on this DIY adventure, gather the following materials:
1. Red fabric (preferably fleece or felt)
2. Blue fabric (preferably fleece or felt)
3. Black fabric (preferably fleece or felt)
4. White fabric (preferably fleece or felt)
5. Stuffing material (polyester fiberfill)
6. Sewing machine (or needle and thread)
7. Scissors
8. Pins
9. Fabric glue
10. Spider-Man pattern (downloadable or create your own)
Step-by-Step Guide:
1. Prepare the pattern: Start by either downloading a Spider-Man plush toy pattern or creating your own. Transfer the pattern onto paper or cardboard, ensuring accurate measurements..
2. Cut the fabric: Using the pattern, cut out the necessary pieces from the red, blue, black, and white fabric. Remember to cut two pieces for each body part to create the front and back.
3. Sew the body: With the red fabric pieces, sew the front and back pieces together, leaving a small opening for stuffing. Repeat this step for the head, arms, and legs.
4. Add details: Use the blue and black fabric to cut out Spider-Man's web pattern and other details, such as the spider emblem. Attach them to the corresponding body parts using fabric glue or by sewing them on.
5. Stuff and close: Stuff each body part with polyester fiberfill to achieve the desired level of softness. Once stuffed, carefully sew the opening closed.
6. Assemble the plush toy: Attach the arms, legs, and head to the main body using either fabric glue or by sewing them securely in place.
7. Fine-tune the details: Use additional fabric or felt to add smaller details, such as Spider-Man's eyes and web lines. Glue or sew them onto the plush toy.
8. Final touches: Take a step back and admire your creation. Make any necessary adjustments or additional embellishments to make the Spider-Man plush toy look as realistic as possible.
Tips and Tricks:
Use reference images of Spider-Man for accuracy and inspiration.
Experiment with different fabrics and textures to add depth and dimension to your plush toy.
Don't be afraid to personalize your creation by adding unique touches or accessories.
Take your time and enjoy the process. Crafting a Spider-Man plush toy is a labor of love that allows your creativity to shine.
Conclusion
Creating your own Spider-Man plush toy is a delightful journey for craft enthusiasts and superhero fans alike. By following this step-by-step guide, you can bring the iconic web-slinger to life with your own handmade creation. With the right materials, attention to detail, and a sprinkle of creativity, your Spider-Man plush toy will become a treasured piece that showcases your craftsmanship and love for the superhero. So, gather your materials, embrace your creativity, and get ready to embark on a DIY adventure that culminates in the creation of a one-of-a-kind Spider-Man plush toy.
Leave a comment
Log in to post comments


Top authors